Showing posts with label Lubricant. Show all posts

Sunday, September 15, 2013

Motorcycle Oil: What Difference Does it Make?


Few debates among bikers can match the intensity of that over what motor oil is the best.  Criticizing someone's choice of oil usually sparks a chain reaction of spirited defenses of particular brands and types of oil, specifically conventional versus synthetic.  Just look at some of the threads on motorcycle forums and you'll see the passion on full display. 

What are the differences between conventional and synthetic motorcycle oil (or any motor oil for that matter)?  In short, it's the quality of the ingredients.  Both oils contain two basic components: base oils and additives.  Base oil quality determines a number of key performance properties, including the ability to resist chemical breakdown, heat resistance, viscosity retention (the ability to resist thinning) and pour point (how fluid the oil is at low temperatures). The goal in manufacturing base oils is a molecularly uniform, pure substance since inconsistencies and impurities limit performance.  Additives in the final formulation offer specific performance features not provided by base oils, like the ability to resist corrosion that may form when bikes are in storage.

The base oils used in conventional oils are anything but uniform and pure.  They are refined from crude oil pumped from within the earth.  Crude oil itself is a poor lubricant; it’s a thick, messy, foul-smelling raw material teeming with molecules of different weights.  Sulfur, paraffin (wax), nitrogen, oxygen and nickel are just some of the molecules in crude harmful to the lubricating process.  Paraffin, for example, thickens as the temperature drops, inhibiting the oil’s ability to quickly flow to critical engine parts at start-up.  Impurities cause the oil to breakdown (oxidize) requiring it to be changed.

Although the refining process used to manufacture conventional base oils removes some of the molecular inconsistencies and impurities, it can’t get them all, resulting in reduced performance.  For example, their ability to resist heat suffers.  The oil can volatilize, or literally boil off, especially in high-displacement, air-cooled bikes operating at the height of summer.  The elevated heat results in evaporation, causing the oil level to drop.  Some of the oil exits the exhaust pipe as emissions; some vaporizes into harmful deposits that form on critical engine parts, like the spark plugs, piston crowns and exhaust valves.  In a matter of time, poor performance can set in, resulting in reduced efficiency and difficult starts.

Just as problematic, conventional oils are more prone to losing viscosity due to mechanical shear. Viscosity is one of the most important features of oil, and the engine is designed to run on oil with a specific viscosity.  The churning action of high-rpm engine parts and transmission gears, coupled with elevated heat, can literally tear apart, or shear, the molecular structure of the oil, particularly the unstable molecules in conventional oils.  As a result, the oil loses viscosity and becomes thinner, compromising wear protection.

In contrast, the chemical reaction process used to manufacture synthetic base oils produces molecularly uniform, pure base oils.  Synthetics demonstrate increased resistance to heat and mechanical shear compared to their conventional counterparts.  By engineering lubricants with synthetic base oils that contain uniform molecules and no impurities, manufacturers can tailor their formulations to address the problems posed by powerful, hot-running bikes, like high heat and mechanical shear.  The end product simply performs better.


As bike manufacturers continue squeezing the greatest amount of power and efficiency out of smaller engines, the challenges of elevated heat and shearing conditions will only worsen.  Not only that, but what biker doesn’t want more power and maximum fuel efficiency?  Synthetics’ uniformity reduces friction compared to conventional oils, often resulting in a slight bump in horsepower and fuel economy.

Conventional oils are limited in the level of performance they can provide.  For that matter, so are synthetic blend oils, which combine an undisclosed percentage of synthetic base oils with conventional base oils.  AMSOIL Synthetic Motorcycle Oils represent one of the least expensive long-term investments bikers can make in the performance and longevity of their motorcycles.


AMSOIL Synthetic Motorcycle Oils outperform other conventional and synthetic motorcycle oils.  Engineered to prevent damaging sludge and carbon deposits, AMSOIL Synthetic Motorcycle Oils promote superior engine cleanliness, while delivering excellent wet - clutch performance and transmission protection.  They resists acid formation and provide superior rust protection, especially important during storage.

AMSOIL Synthetic Motorcycle Oils provide maximum wear protection in the most demanding operating conditions.  Long rides in hot weather can cause inferior oils to lose viscosity.  The thinner oil fails to protect bearings and other critical components from wear.  As indicated by the test results below, each viscosity of AMSOIL Synthetic Motorcycle Oil exceeds either the standards of their viscosities for high-temperature film strength or that of the competition to deliver exceptional wear protection.  Higher values reflect better film strength.


AMSOIL 20W-50 Synthetic Motorcycle Oil is recommended for Harley-Davidson®, Buell®,
KTM®, Ducati®, BMW®, Aprilia® and Triumph® motorcycle engines, transmissions and primary chaincases.

AMSOIL 10W-40 Synthetic Motorcycle Oil is recommended for Honda®, Kawasaki®, Yamaha®, Suzuki®, Victory®, BMW® and Husqvarna® motorcycle engines and transmissions.

AMSOIL 10W-30 Synthetic Motorcycle Oil is recommended for Honda, Yamaha, Suzuki and Kawasaki motorcycle and scooter engines and transmissions.

AMSOIL SAE 60 Synthetic Motorcycle Oil is recommended for early-model air-cooled V-Twin engines where a 60-weight motor oil is specified.  SAE 60 motor oils are commonly used in Harley-Davidson Knucklehead, Panhead, Shovelhead and big-bore motorcycles.

Harley-Davidson/AMSOIL Oil Chart:  http://www.amsoil.com/products/streetbikes/oil_chart.aspx


Friday, April 12, 2013

John Deere Attachments (Dethatcher)

Let me tell you up front - dethatching is not glamorous.  I know that's hard to believe but it's true.  But it's a necessary part of taking care of your lawn.  And like my John Deere Lawn Sweeper, which I talked about in my last post, my John Deere Dethatcher does what it's designed to do and it does it well.  I'll get into the dethatcher details in this post. 


First of all, why should you dethatch your lawn?  Thatch is the layer of built-up plant material between the green top growth and the roots of your grass.  Thatch develops naturally as lawn grasses grow and shed roots, shoots and leaves. Some thatch helps protect the roots, but too much thatch prevents water, oxygen and nutrients from getting through to the soil.  You can help avoid thatch build-up by mowing frequently so that the blades of grass are smaller and will decompose more quickly.  Grass clippings contain nutrients that are good for your grass, including the nutrients that you've already applied through fertilizer.  I always try to dethatch before I apply fertilizer so that the fertilizer better penetrates to the roots.  And I always dethatch before the grass is actively growing just because it's easier for the dethatcher to get through the grass without building up on the tines, although technically it could be done anytime during the season.

The other reason that I use my John Deere Dethatcher is the moss in my lawn.  The yard has lots of trees both throughout, creating lots of shady spots.  That, combined with the moisture and humidity and the clay soils that we have here in the south, provides the perfect environment for moss to thrive.  If moss is allowed to grow unchecked, it will simply take over, which I've allowed it to do in certain areas where I didn't really want grass anyway.  Although moss is green and soft (and cuddly) and actually looks good in the right locations, moss and grass just don't mix.


The John Deere Dethatcher is an outstanding tool for removing both thatch and moss although once the moss is removed, seeding with a shade tolerant grass seed is critical since the moss will always come back if the ground is left bare.  It sometimes seems like a never ending battle but it does give me an excuse to use my dethatcher (got to think positive!).

The first step is to make sure that the dethatcher is heavy enough to scrape up the moss and thatch  without just bouncing along the ground behind the tractor.  Loading it up with several bricks does the trick.  And since the grass is not long this time of year, I set the dethatcher at the lowest level so it scrapes fairly deep (if the grass is high, setting it too low will just clog up the tines, turning a "not so bad job" into a "really horrible job" as you jump off the tractor every five minutes to clear off the tines).  

Dethatcher Ready to Go!
Moss in the Yard

Moss after Dethatching
More Moss after Dethatching

 The dethatcher works great on thatch as well (my kids would tell me "duh" but it really works well): 


After a few passes with the dethacher, there's loads of moss and thatch that should not be left lying on the grass thereby defeating the whole purpose for all that hard work riding around on the tractor.  So with another excuse to use my John Deere Lawn Sweeper, I sweep up what's been removed.  It's heavy stuff and there's lots of dumping involved, but the sweeper handles it extremely well.  


As with the sweeper, once the job is done it's time to clean off the dethatcher.  It gets pretty dirty and muddy and the bricks bouncing around tend to wear off the paint creating some bare metal spots.  AMSOIL Metal Protector (MP) (AMSOIL Product Code AMP) is the ideal product to use after rinsing and before putting up the dethatcher for the season.  AMSOIL MP does an outstanding job protecting against rust and providing lubrication where there's metal to metal contact.  

AMSOIL MP Metal Protector (old packaging)
AMSOIL MP Metal Protector (new packaging - same great formula)

AMSOIL MP is an easy-to-use spray-on product that protects metal surfaces, displaces water and silences squeaks.  It lubricates metal surfaces, leaving a dry wax-like film, doesn't form gum or sludge and it's compatible with plastic, fabric and paint.  The greatest thing about it is that it doesn't leave a film that attracts dust or dirt so I just spray it on and leave it.  In all the years that I've been washing down and protecting my equipment, I've never had any rust or corrosion problems while using AMSOIL MP.  It certainly provides piece-of-mind to an equipment junky like me.  Even better, when it's time to use the equipment again, I know that it's lubricated and ready to go.  You won't believe how many uses you can think of for AMSOIL Metal Protector!


Thanks for visiting this post.  We'll talk about fertilizing the lawn with AMSOIL's AGGRAND Natural Based Fertilizer using my Northstar Sprayer (from Northern Tools and Equipment) in the next post.

Questions, comments and advice are always welcome!!


Tuesday, April 9, 2013

JOHN DEERE MAINTENANCE (Part 3 - Air/Fuel Filters, Spark Plugs, Cleaning, (and other stuff))

Well, as the saying goes, an equipment perfectionist's work is never done (or something like that).  We've discussed lubricating the chassis and changing the oil/filter on the John Deere LA175 and the final few maintenance jobs will ensure maximum performance throughout the upcoming mowing season and many years to come.

Check/Clean/Replace Air Cleaner Element 

The air filter is made up of two parts, the air filter element itself and the foam precleaner which slips over it.  Although the service interval chart in the LA175 Operator's Manual says that the air filter should be replaced every 50 hours, the specific instructions in the manual say that the air filter should be replaced "only if it is very dirty, damaged or the seal is cracked."  Although there's certainly nothing wrong with replacing the filter element, since mine was not any of the things listed in the manual I went ahead and reused it, a judgment call on my part (erring on the side of not spending any money). 

Before removing the air cleaner from the engine, I made sure that all dirt and debris was cleared away from the cover so no dirt fell into the air cleaner base when I took out the filter (where it could fall or get sucked into the engine).  I next removed the foam precleaner from the air filter (being careful not to rip it).  Given that the prefilter was not too dirty or damaged to the point where I needed to replace it, I washed it in warm soapy water to clean it (just make sure that it's is completely dry when you reinstall it so that no water gets into the engine). 


Although the manual says that you should not attempt to clean the paper element by tapping it against another object, as long as I tap gently without causing any damage, that's what I do.  The manual also says not to used pressurized air to clean the element, but again I gently used low pressure air from  my compressor to blow from the inside out.  Although I didn't strictly follow the John Deere manual, just thinking it through I could not see a reason not to do these things as long as the element was not overly dirty and I was careful.  I know, I know, a rules violation, but this is a perfect example of why I do my own maintenance - I make the judgment call and if I'm wrong I have to live with the consequences; but as long as I'm careful, use common sense and think about what I'm doing while I'm doing it I have confidence that the job is done right (the last thing I want to do is to re-insert a damaged element and allow dirt to enter the engine during operation). Finally, before reinstalling the filters, I wipe out the filter housing with a cloth to get out any dust and debris. 

Unfortunately, AMSOIL does not make an air filter for this application so when the time comes to replace the filter, I'll use a John Deere part.  

Clean Engine Air Intake/Cooling Fins

This one's easy since I use my blower to blow off the engine after every use anyway.  Grass or other debris tends to get stuck on the engine air intake so I take special care to make sure that is clean and that the engine gets plenty of air to avoid overheating.


Change Spark Plugs

Although the thought of changing a spark plug may seem a little daunting if you've never done it before, just pay attention to what you're doing and you'll be fine.  For this job you will need a socket wrench with a 5/8" spark plug socket (spark plug sockets have a rubber insert that holds the plug snug so as not to break or crack the porcelain).  I also recommend using a torque wrench since over tightening a spark plug could damage either the plug or the threads in the cylinder head (a very bad thing).  Finally, while most spark plugs come pre-gapped from the manufacturer, a gapping tool is good to have on hand to make sure the gap between the spark plug's center electrode and the ground electrode are the right distance apart. 

The John Deere spark plug, John Deere part number M78543, is actually a Champion spark plug, part number RC12YC, and it will obviously work fine in your tractor.  But if you're looking for something better, AMSOIL has partnered with NGK, one of the world's leading spark plug manufacturers, to provide the finest spark plugs available on the market. NGK Standard plugs provide excellent service for small engine applications, including John Deere lawn tractors.  NGK plugs provide better protection against fouling, greater ignitability and improved performance.  The NGK part number is BK5RE (AMSOIL stock code NGK7938). 

NGK7938

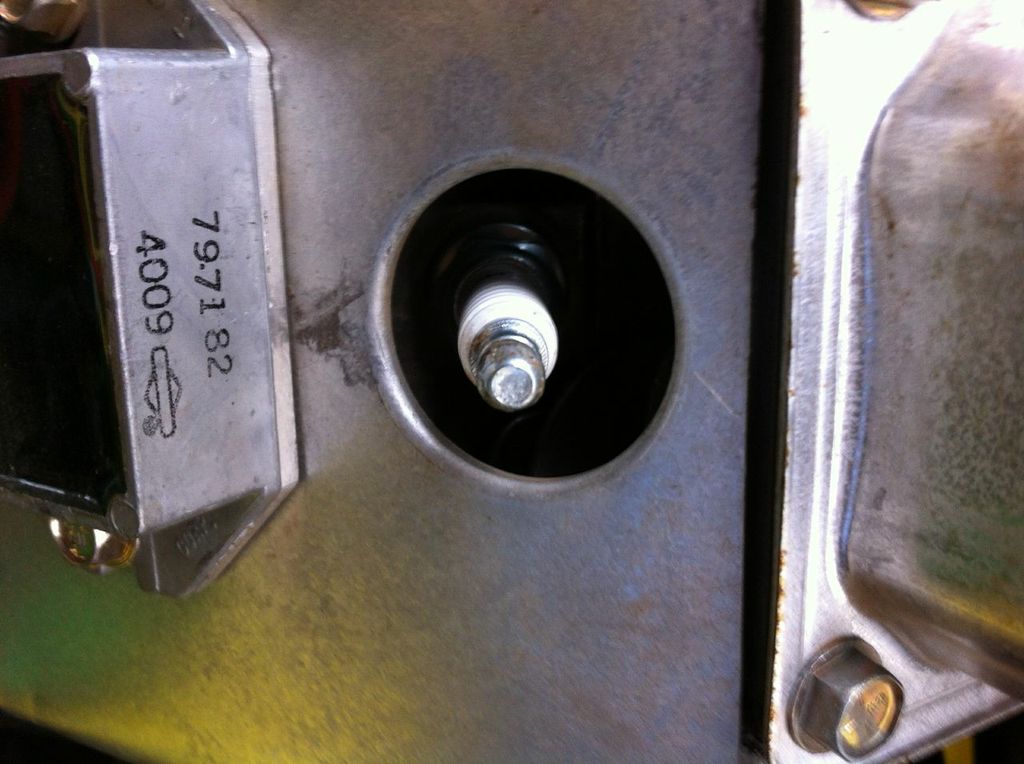
To change the plug, I first take compressed air (you can use a wet/dry vacuum as well) to blow away any dirt and debris around each plug before removing it.  This helps prevent anything from falling into the cylinder when taking out the old plug.  First remove the wire to the plug you will change (one on each side of the engine) and then use your socket wrench with spark plug socket to remove the plug (turn the wrench counter-clockwise). The spark plug should unscrew easily. If you encounter resistance, stop.  Forcing the spark plug to turn could break the plug or damage the engine. It's better to visit a mechanic to remove a stubborn spark plug than to perform expensive cylinder head repairs.


Before installing the new plugs, make sure that the gap on the new plugs is set at .76mm (0.030 in).  When inserting the new plugs make sure that they are inserted correctly into the hole and that they are easy to turn at first.  Again, if they are hard to turn or you encounter resistance when first inserted, don't force them, remove them and start over.  Although I didn't find it necessary, you could use anti-sieze compound on the threads before inserting (don't get it on the electrodes or it could ruin the plug).  Once the spark plug is snug, attach your spark plug socket to your torque wrench to tighten the plug so that the plug's washer is compressed against the mounting surface. John Deere requires that the plugs be tightened to 20 N*m (15 lb-ft); don't over-tighten.  When putting the wire boots back on the plugs, I spread a little dielectric compound in the boot with a Q-tip in order to help protect against corrosion and to make it a little easier to get the wire off in the future. 


 Replace Fuel Filter

According to the Operator's Manual, the fuel filter should be changed every 50 hours of operation.  In order to avoid fuel gushing everywhere when you take off the old filter, it's best to do this job when the fuel in the tank is low (since there will be less pressure and therefore less gushing).  Also, make sure you do this when the engine is cool since there is no way to avoid some fuel leaking from the gas line (heat and raw gas tend not to mix).

The fuel filter is located next to the oil filter.  Put a drain pan under the filter to catch any fuel that may spill.  Using a pair of pliers, slide the hose clamps away from the filter.  A bit of advice: have the new filter ready to go since the gas is going to start running out when you disconnect the hose coming from the gas tank (the bottom one) and it doesn't stop.  Even better, have a helper available to hold the bottom hose vertical once disconnected to minimize the amount of fuel that comes out.  (Another bit of advice: if your wife holds the hose she will get gas on her hands and she will smell like gas for awhile - if this is a bad thing for her, please warn her beforehand in order to minimize the amount of trouble that you will be in).  Connect the hoses to the new filter making absolutely sure that the arrow on the filter is pointed in the direction of the fuel flow (from the tank towards the engine).  If the filter is installed upside down (with the arrow in the wrong direction), the engine will not get the correct amount of fuel and could be damaged. 


Like the oil filter from my previous post, I had an extra fuel filter left over from my days at Lowe's which I used since I hate wasting parts (and money).  So I did not use AMSOIL as my source for the fuel filter and guilt washed over me for a second time.  AMSOIL offers both Donaldson and WIX fuel filters which can be used in this application: (Donaldson) P550094; (WIX) 33011).
WIX 33011

Donaldson P550094

Clean Battery Terminals

Not much to say here.  Since I blow the mower off after each use, and since there has been no leakage from the terminals, this has not been an issue for me.  If the terminals were corroded, I would clean them with a mixture of baking soda and water.


Check Air in Tires

For the same reasons that you keep your car tires properly inflated (fuel economy, wear, traction, etc.) the tires on your tractor should also be kept at the correct pressure.   After sitting in the garage for about three months, the tires on the LA175 definitely needed air.  Having a compressor makes this job much easier.  Tires should be inflated to the pressure specified on the side of the tire (12 psi).

Cleaning the Engine and Tractor

Some might call me "overzealous" (or perhaps other adjectives) when it comes to making sure my tractor is clean, at least at the beginning of the mowing season (I don't know why but having the tractor at least somewhat clean just makes me feel better!).  After changing the oil and the fuel filter, with the gas and oil dripping all over the place, and with the dust and material picked up over the course of the mowing season, I like to clean the engine first.  AMSOIL Power Foam Engine Cleaner (AMSOIL Product Code APF) was originally recommended for cleaning interior engine parts (carburetors, intake valves, throttle plates, etc.), as well as a degreaser for cleaning exterior engine surface.  It contains a powerful foaming agent and special high boiling solvents that penetrate rust and grease.  It washes clean, leaving no residue to attract more dirt.  AMSOIL recently introduced a new product, Heavy-Duty Degreaser (AMSOIL Product Code ADG) formulated with powerful and fast-acting solvents which attack petroleum-based grime on a molecular level to loosen its hold on metal, concrete, engines and other surfaces. Its active citrus formula makes cleaning easy and leaves a clean scent. Because I have several cans of Power Foam left in stock, I used the Power Foam to clean the engine (Power Foam also now has a new container). 
 
AMSOIL Power Foam Engine Cleaner (old packaging)
AMSOIL Power Foam Carburetor and Induction System Cleaner (new packaging)

AMSOIL Heavy-Duty Degreaser

I spray Power Foam on the greasy areas of the engine, let it sit for a few minutes and then wash it off with water, taking care not to spray water into the air intake or interior portions of the engine.  Believe me, your engine will come out looking great!

Before Power Foam


During Power Foam


After Power Foam
Finally, I wash the rest of the tractor down, use some spray wax on the green and yellow parts (I use Griot's Speed Shine which I really like - quick, easy and leaves behind a great shine).  Here's the finished product, ready for the season:


Thanks for visiting this post.  I'll discuss some useful John Deere attachments that I use around the yard in upcoming posts.  

Questions, comments and advice are always welcome!!